Mon Panier


| Désignation | Référence | Qté |
|---|

          9. CYLINDER/PISTON                                   MXU 500 IRS


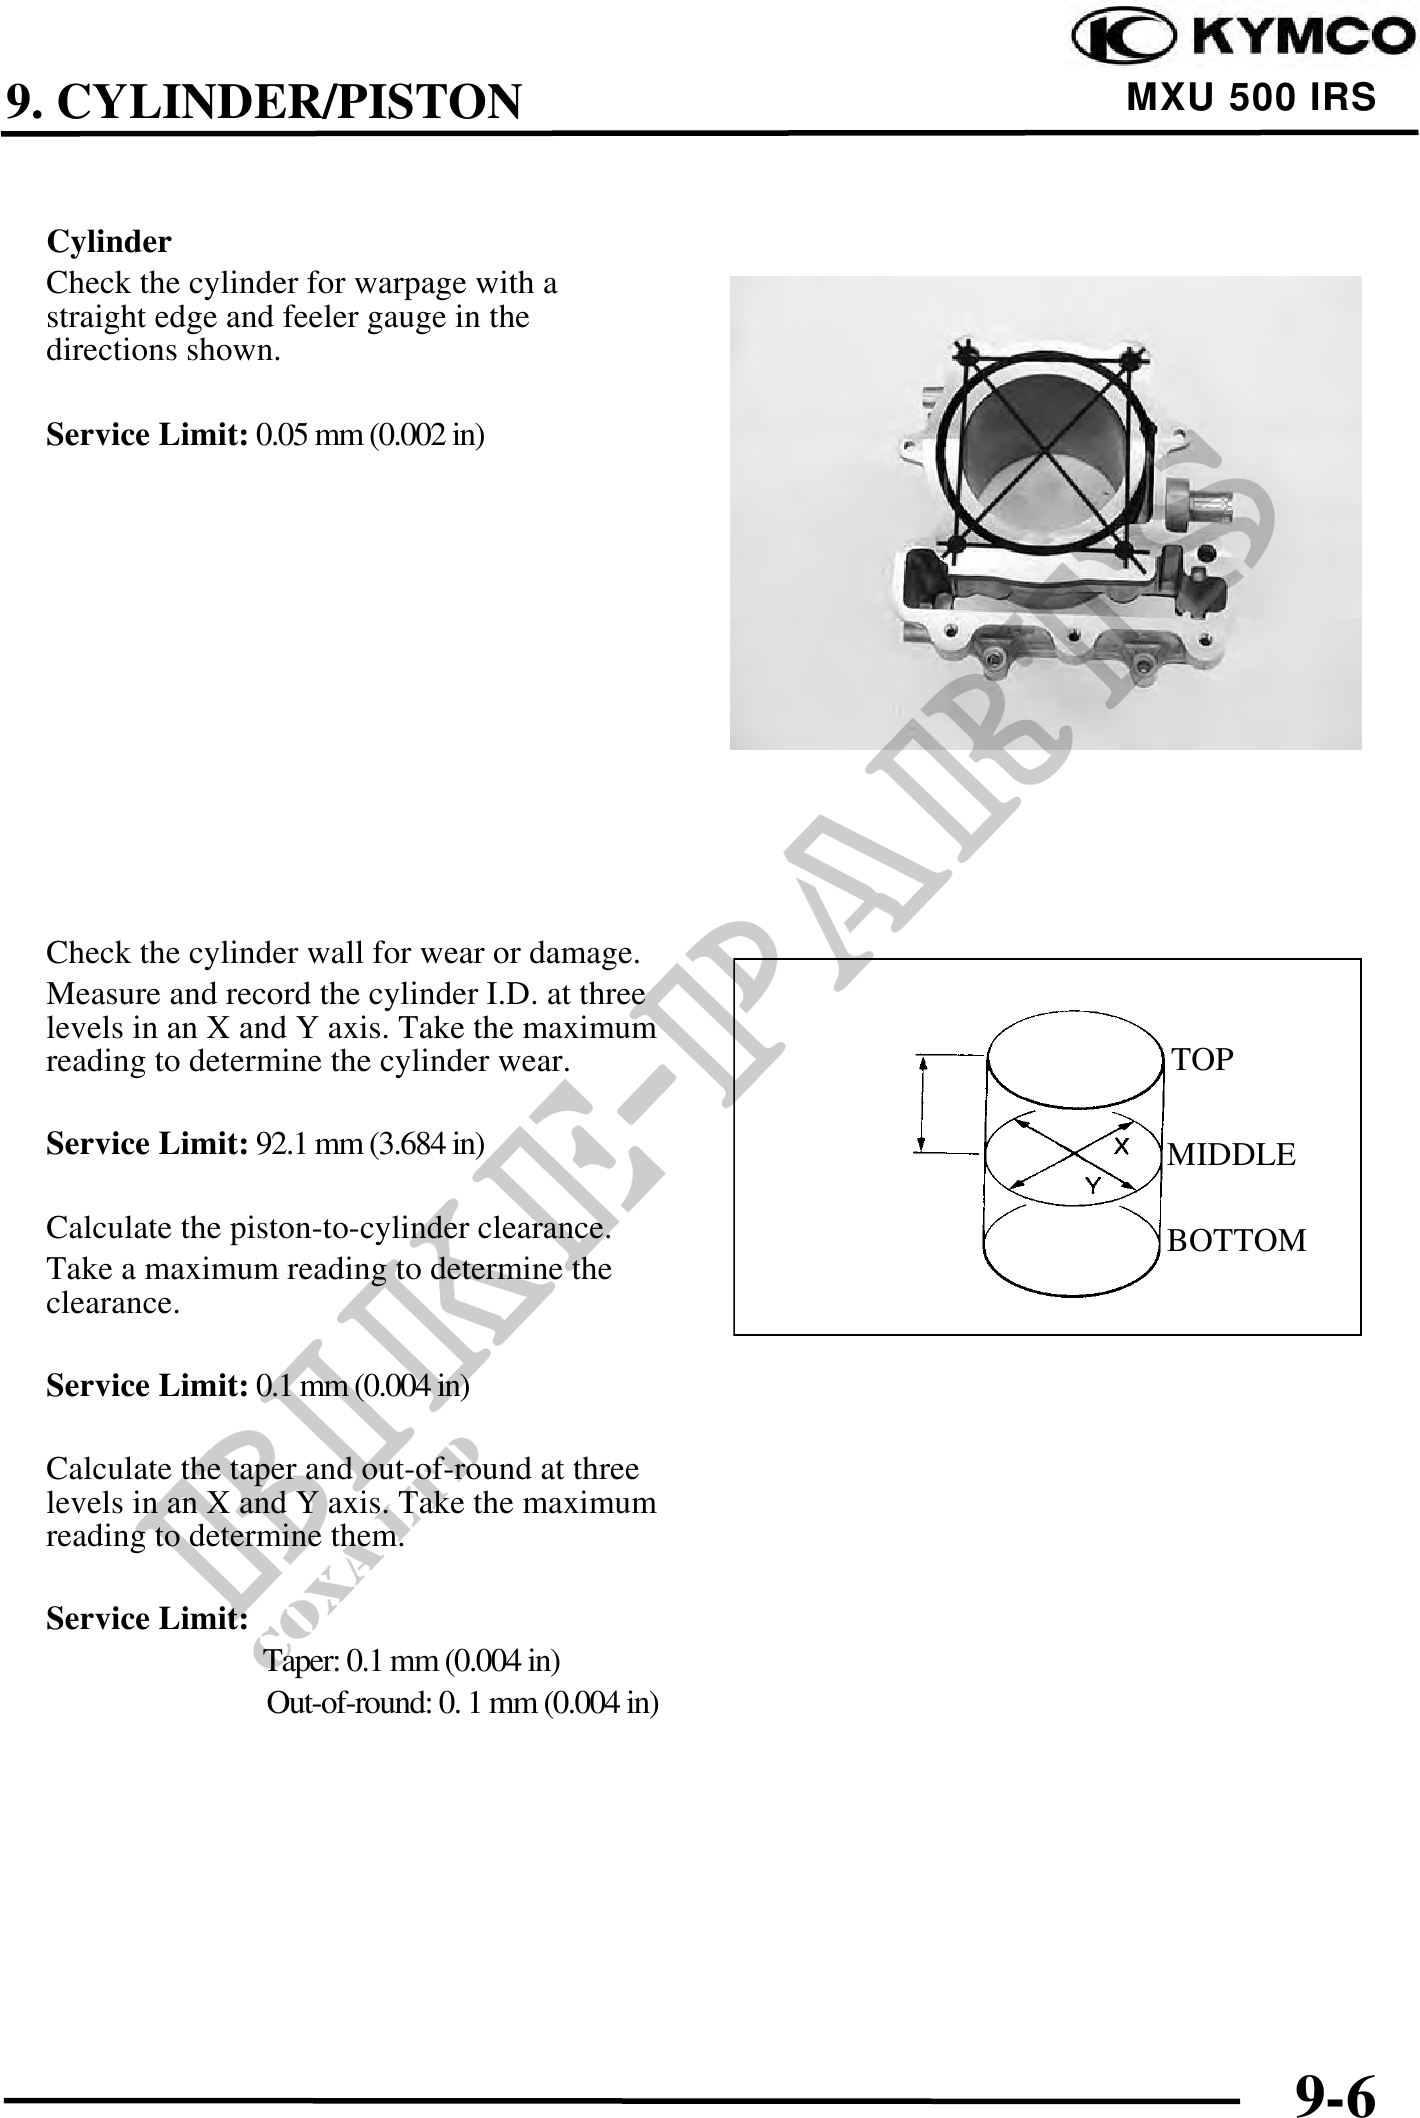
 Cylinder
 Check the cylinder for warpage with a
 straight edge and feeler gauge in the
 directions shown.

 Service Limit: 0.05 mm (0.002 in)


 Check the cylinder wall for wear or damage.
 Measure and record the cylinder I.D. at three
 levels in an X and Y axis. Take the maximum
 reading to determine the cylinder wear.              TOP

 Service Limit: 92.1 mm (3.684 in)                    MIDDLE

 Calculate the piston-to-cylinder clearance.          BOTTOM
 Take a maximum reading to determine the
 clearance.

 Service Limit: 0.1 mm (0.004 in)

 Calculate the taper and out-of-round at three
 levels in an X and Y axis. Take the maximum
 reading to determine them.

 Service Limit:
                  Taper: 0.1 mm (0.004 in)
                  Out-of-round: 0. 1 mm (0.004 in)


                                                            9-6